idea如何搭建spring boot_搭建框架
Hi,大家好,我是编程小6,很荣幸遇见你,我把这些年在开发过程中遇到的问题或想法写出来,今天说一说
idea如何搭建spring boot_搭建框架,希望能够帮助你!!!。
🍅程序员小王的博客:程序员小王的博客
🍅 欢迎点赞 👍 收藏 ⭐留言 📝
🍅 如有编辑错误联系作者,如果有比较好的文章欢迎分享给我,我会取其精华去其糟粕
🍅java自学的学习路线:java自学的学习路线
- Springboot的优点
约定大于配置 ; 帮我们自动配置了我们需要配置的内容; 并且帮我们自动下载了需要下载的jar包以及运行环境;
优点: 方便,作为初学者来说直接使用就可以了;
缺点: 出现问题,我们作为初学者很难去定位解决;
一、idea手工搭建SpringBoot项目
1、点击file==>点击new==>moudle
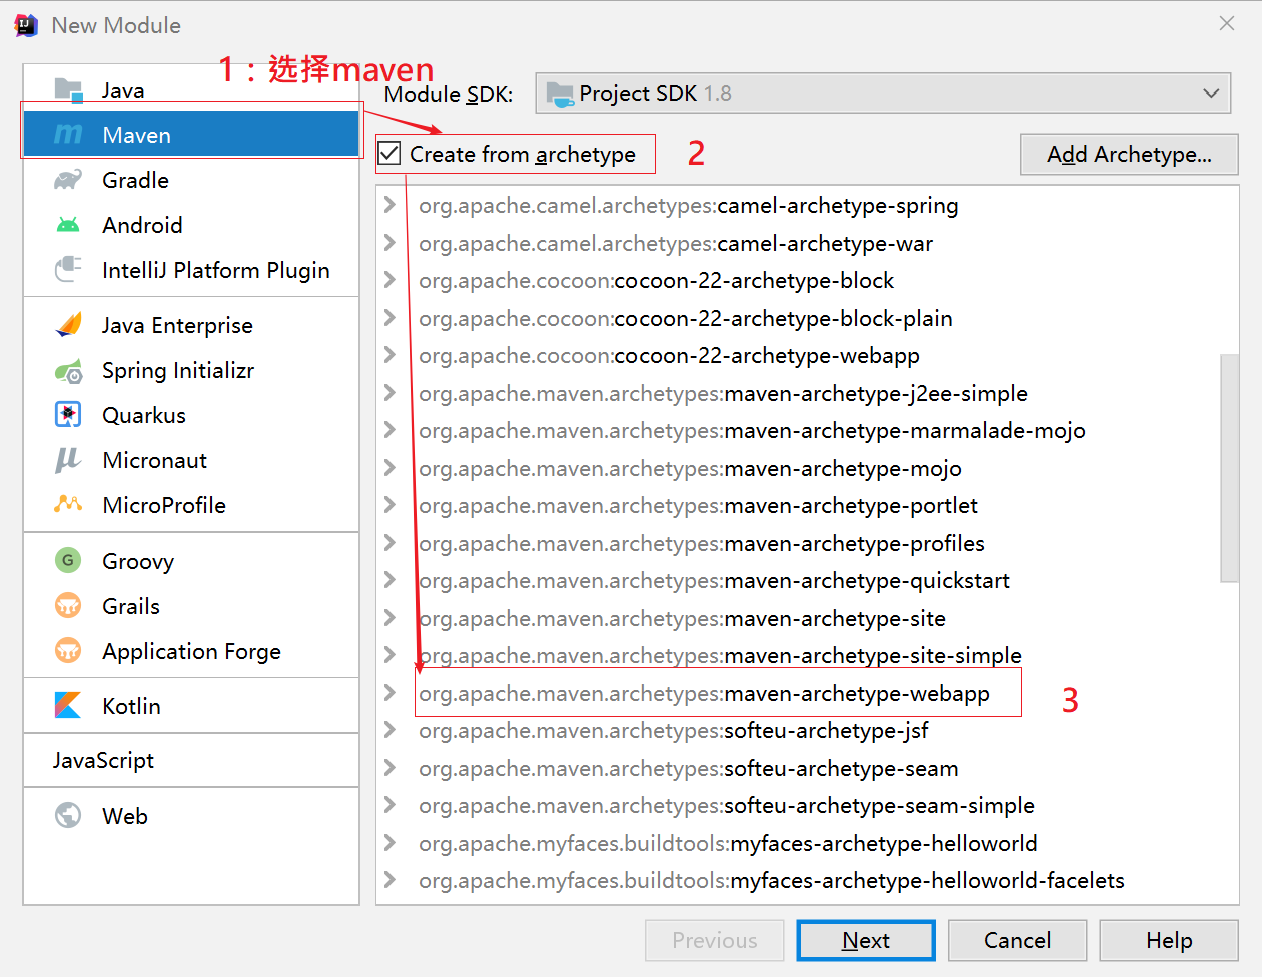
2、选择maven==>勾选Create from archetype==>maven-archetype-webapp==>下一步
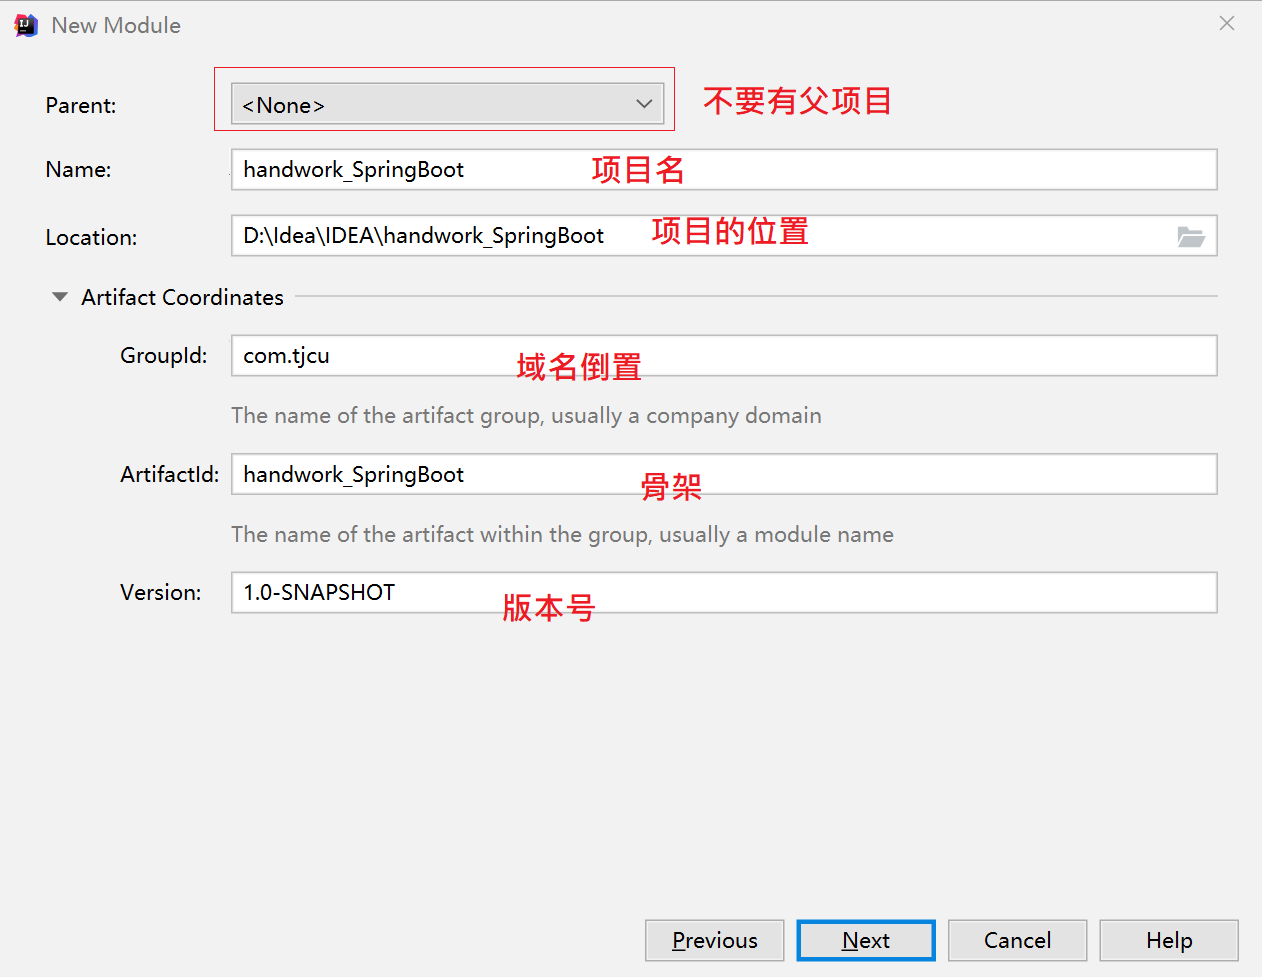
3、根据图设置之后点击下一步
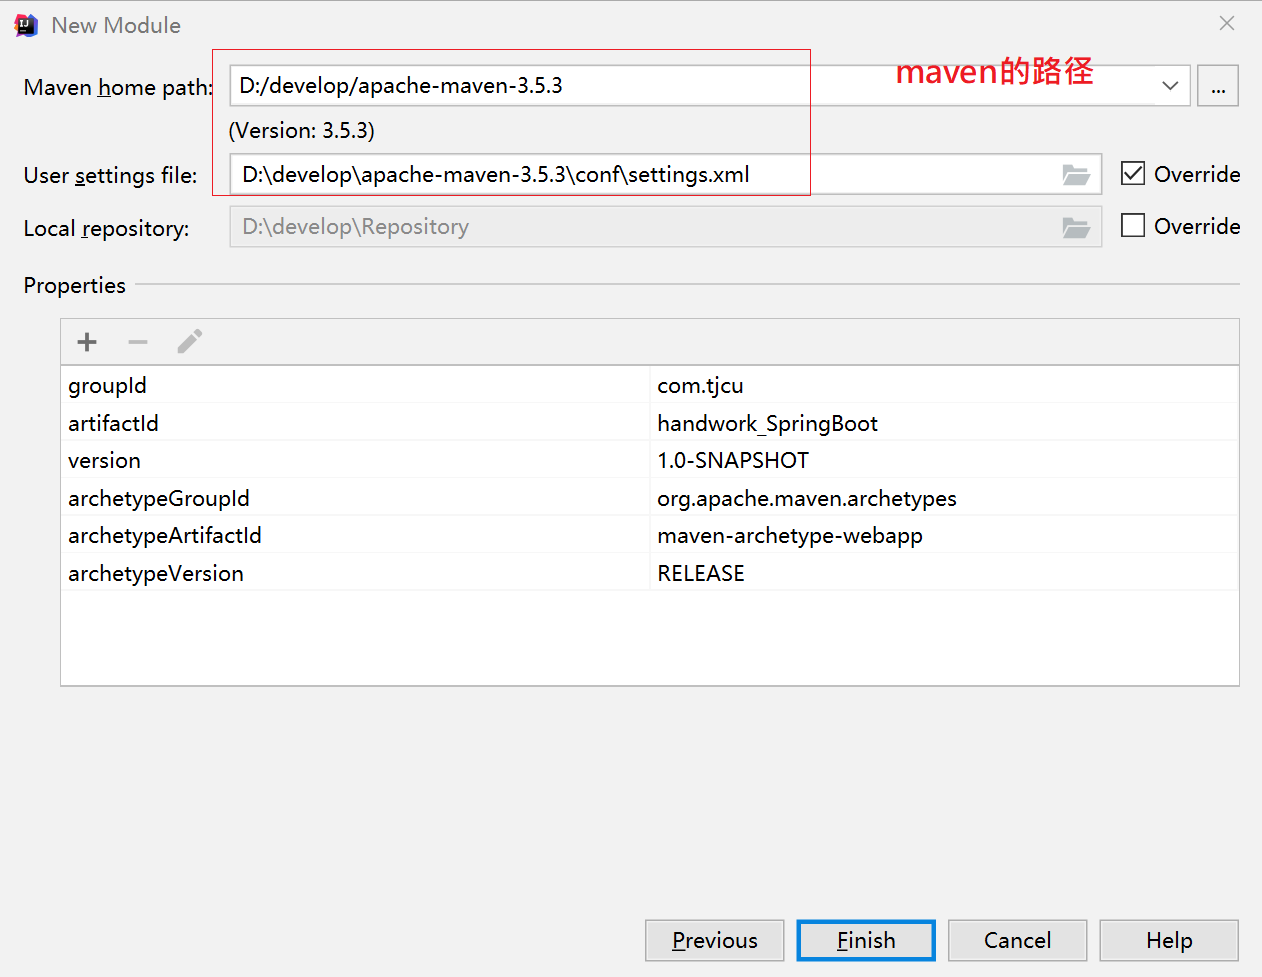
4、点击下一步
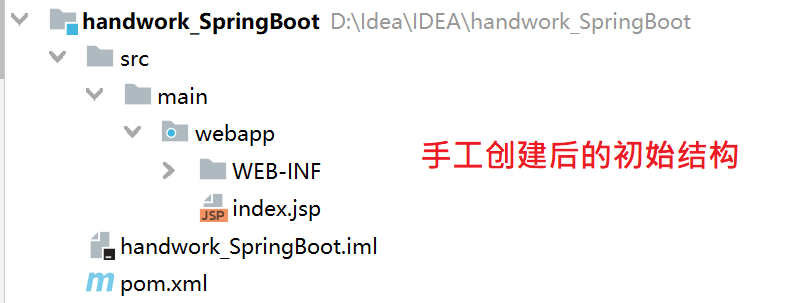
5、手工创建后的初始结构
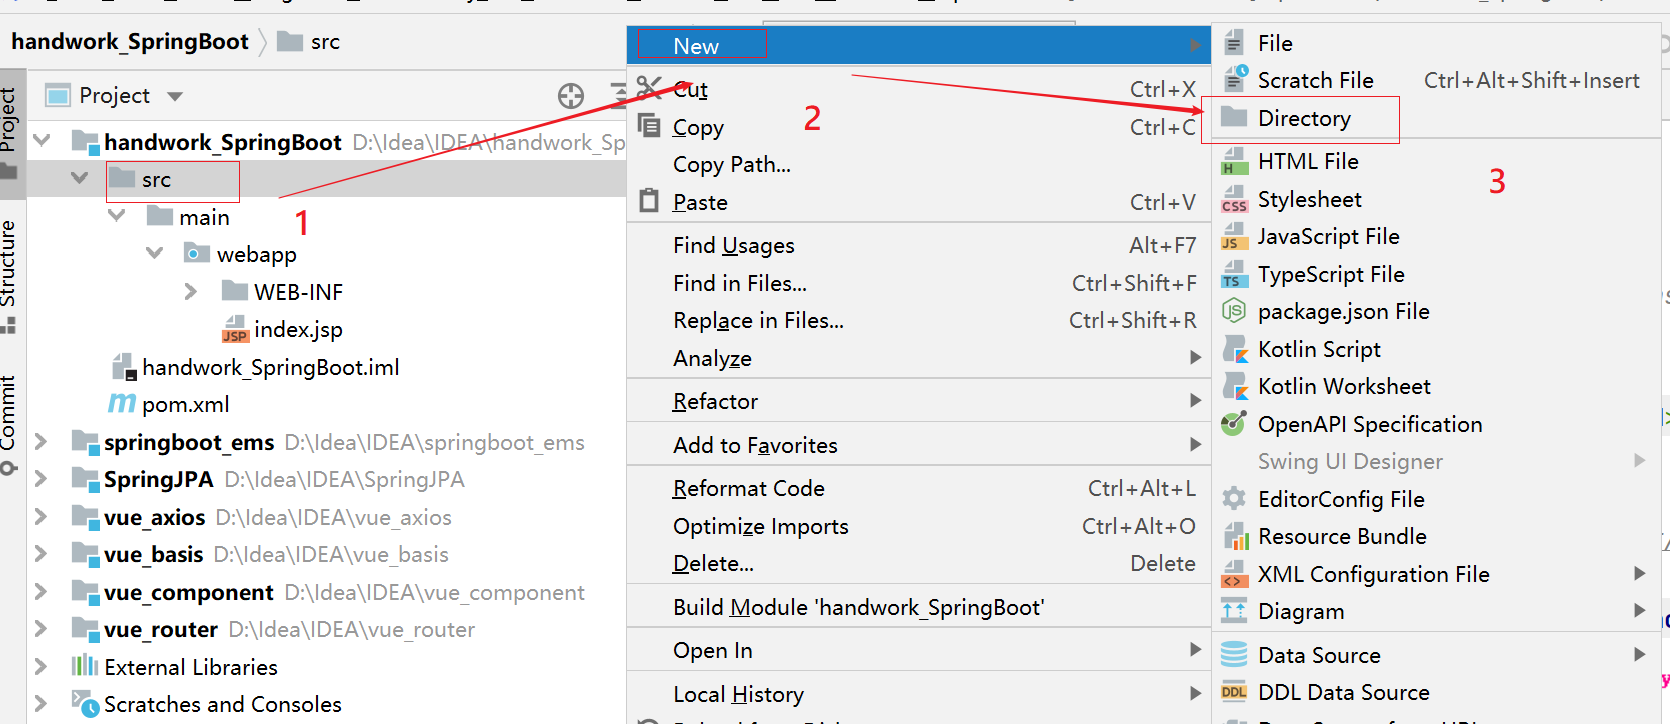
6、右击src==>点击new==>directory
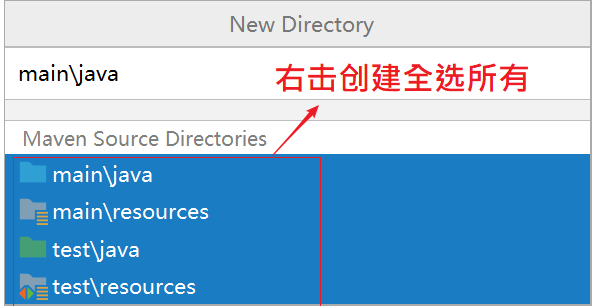
7、选择图片中的所有
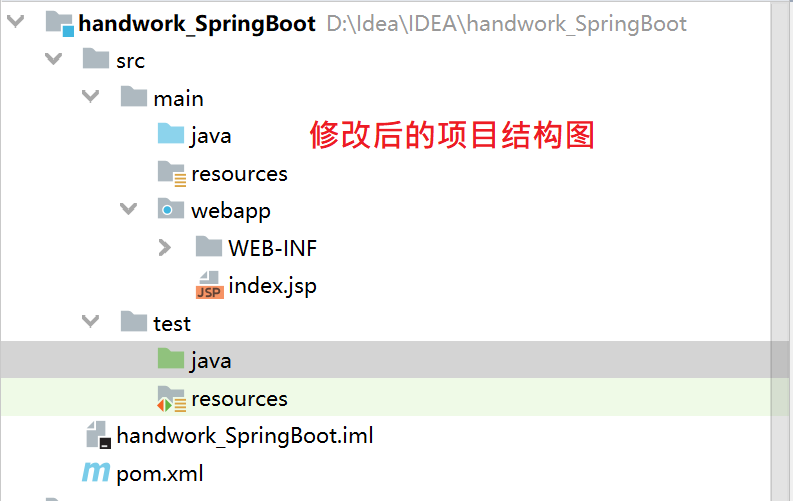
8、修改后的项目结构图
9、修改pom.xml配置依赖文件
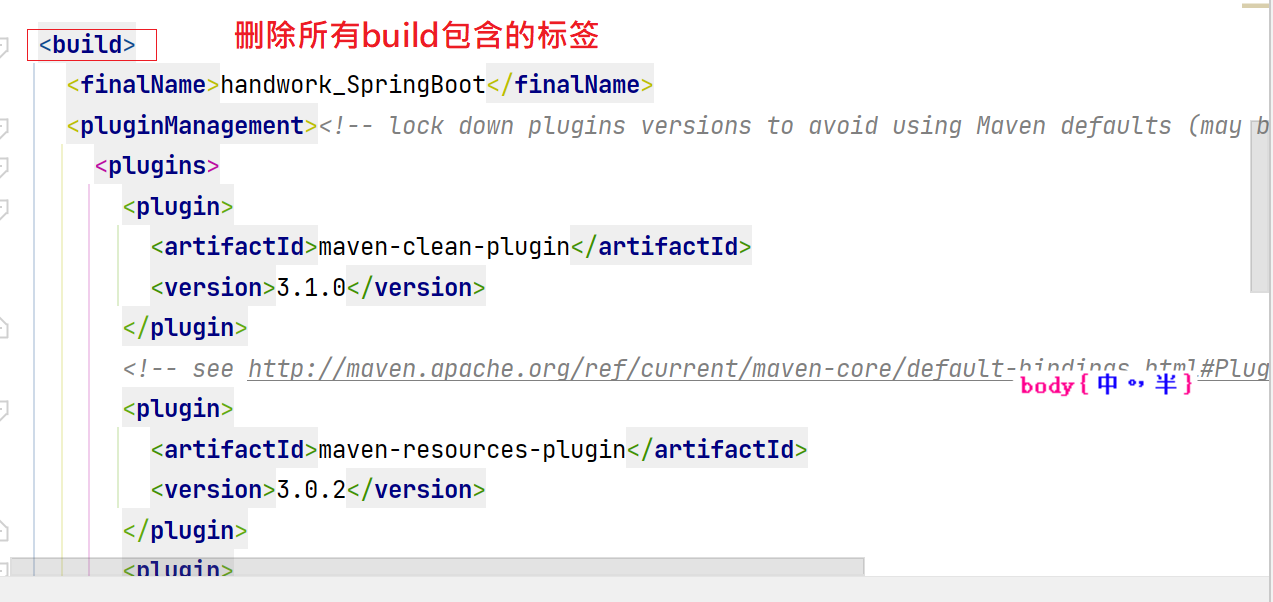
(1)删除所有build包含的标签
(2)继承springboot父项目,引入web,test相关依赖
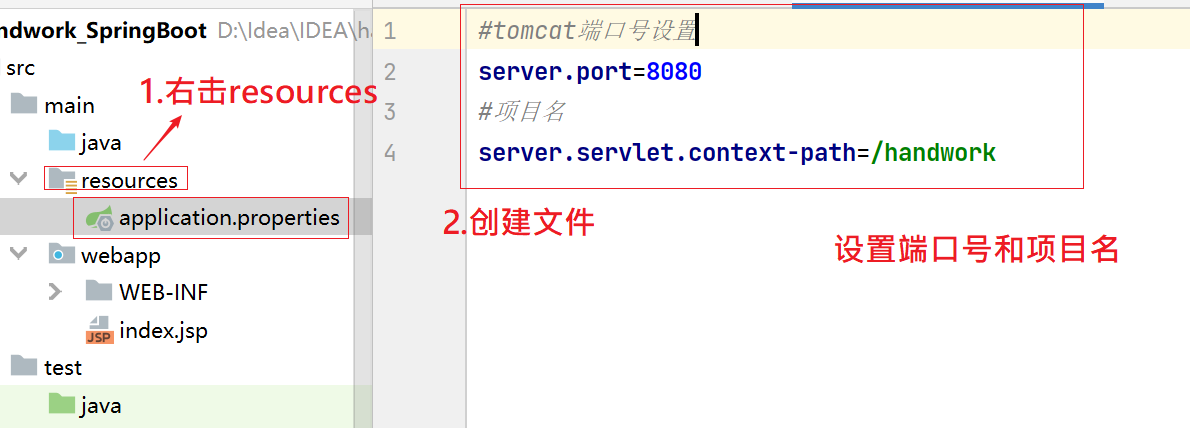
<groupId>com.tjcu</groupId> <artifactId>handwork_SpringBoot</artifactId> <version>1.0-SNAPSHOT</version> <packaging>war</packaging> <properties> <project.build.sourceEncoding>UTF-8</project.build.sourceEncoding> <maven.compiler.source>1.8</maven.compiler.source> <maven.compiler.target>1.8</maven.compiler.target> </properties> <!--1.继承springboot父项目--> <parent> <groupId>org.springframework.boot</groupId> <artifactId>spring-boot-starter-parent</artifactId> <version>2.2.5.RELEASE</version> </parent> <dependencies> <!--spring-boot-stater-web--> <dependency> <groupId>org.springframework.boot</groupId> <artifactId>spring-boot-starter-web</artifactId> </dependency> <!--引入springboot-stater-test--> <dependency> <groupId>org.springframework.boot</groupId> <artifactId>spring-boot-starter-test</artifactId> <!--scope test 仅仅在测试时有效 运行 打包 不生效--> <scope>test</scope> </dependency> </dependencies> 10、创建application.properties文件
项目中src/main/resources/application.yml
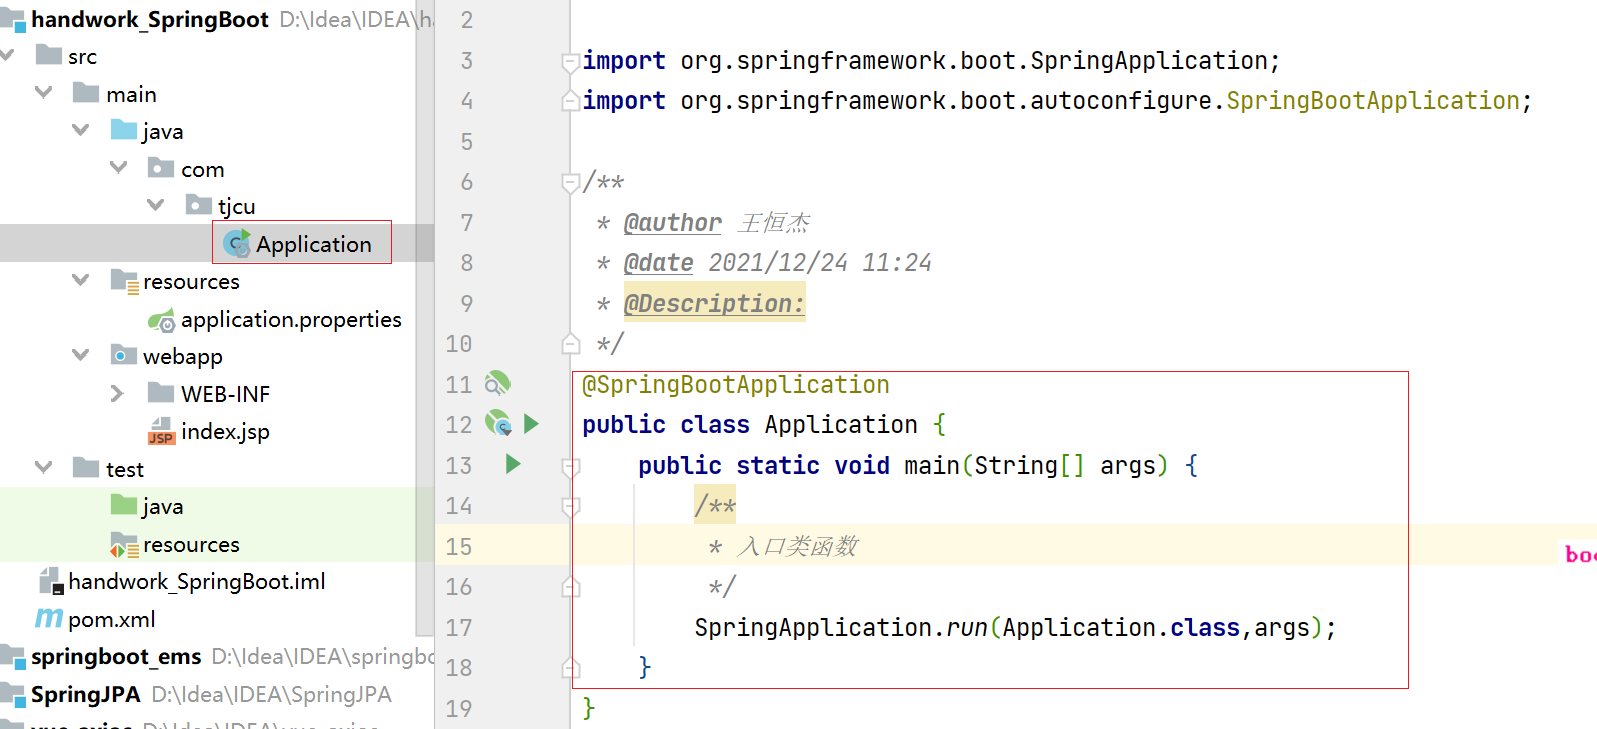
11、创建入口类函数
@SpringBootApplication public class Application {
    public static void main(String[] args) {
    /** * 入口类函数 */ SpringApplication.run(Application.class,args); } }
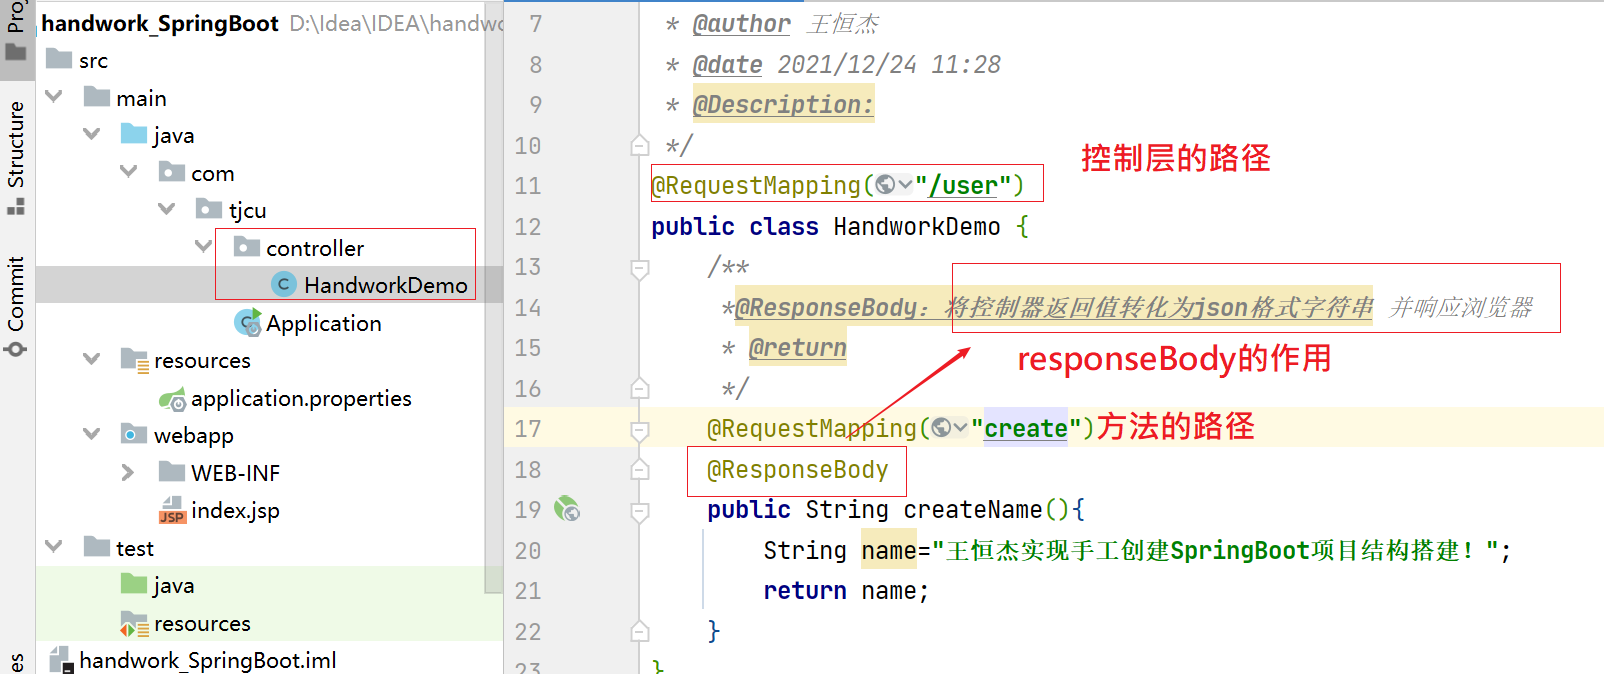
12、创建控制层
@RequestMapping("/user") public class HandworkDemo {
    /** *@ResponseBody:将控制器返回值转化为json格式字符串 并响应浏览器 * @return */ @RequestMapping("create") @ResponseBody public String createName(){
    String name="王恒杰实现手工创建SpringBoot项目结构搭建!"; return name; } }
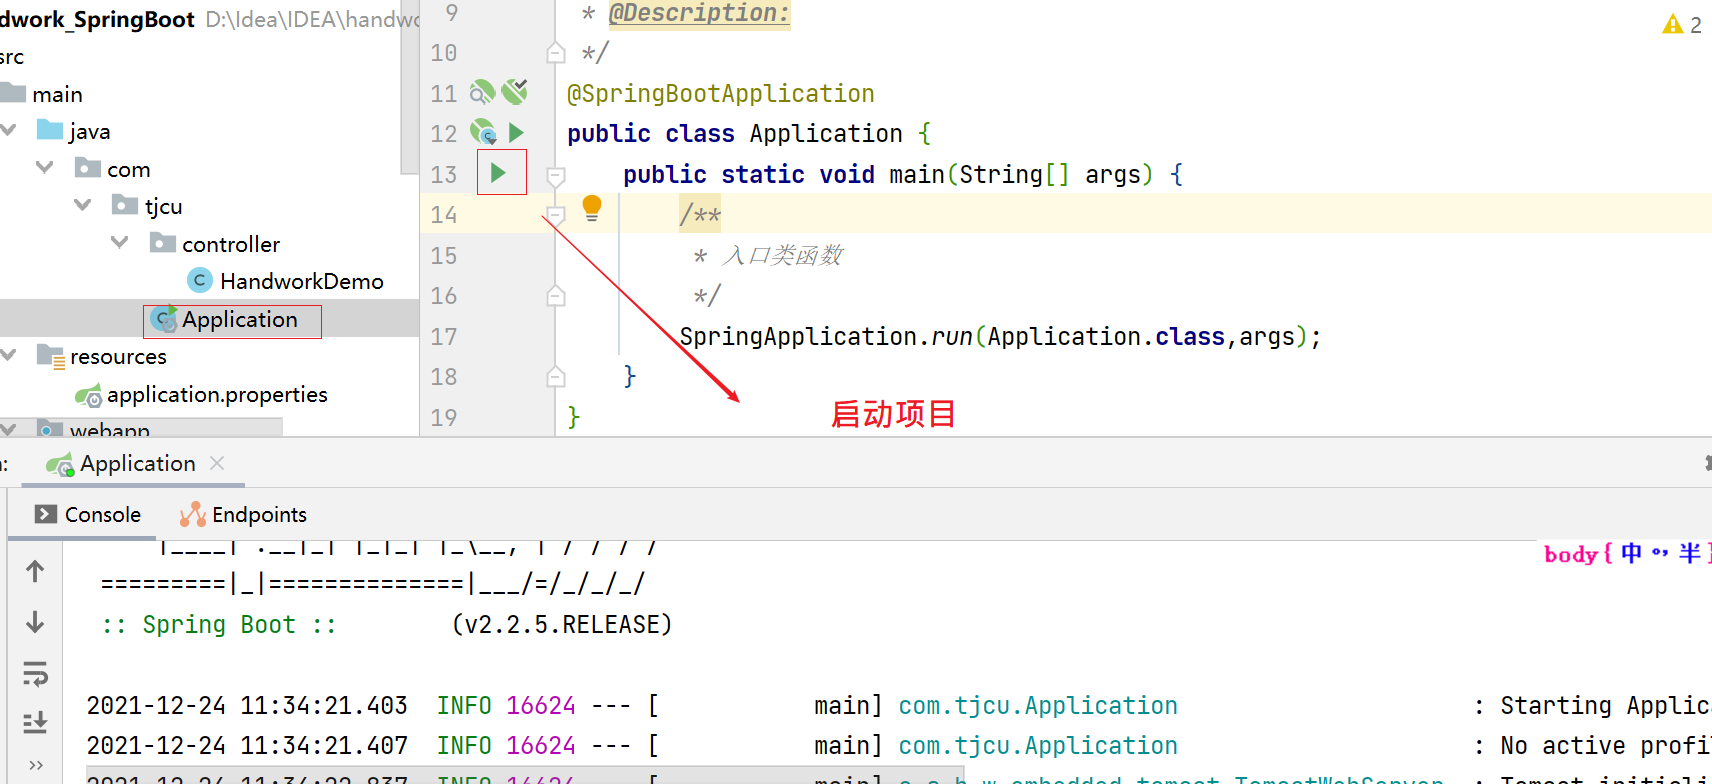
13、运行main启动项目
(1)启动项目
(2)启动项目成功后
14、访问项目
二、idea自动搭建SpringBoot项目
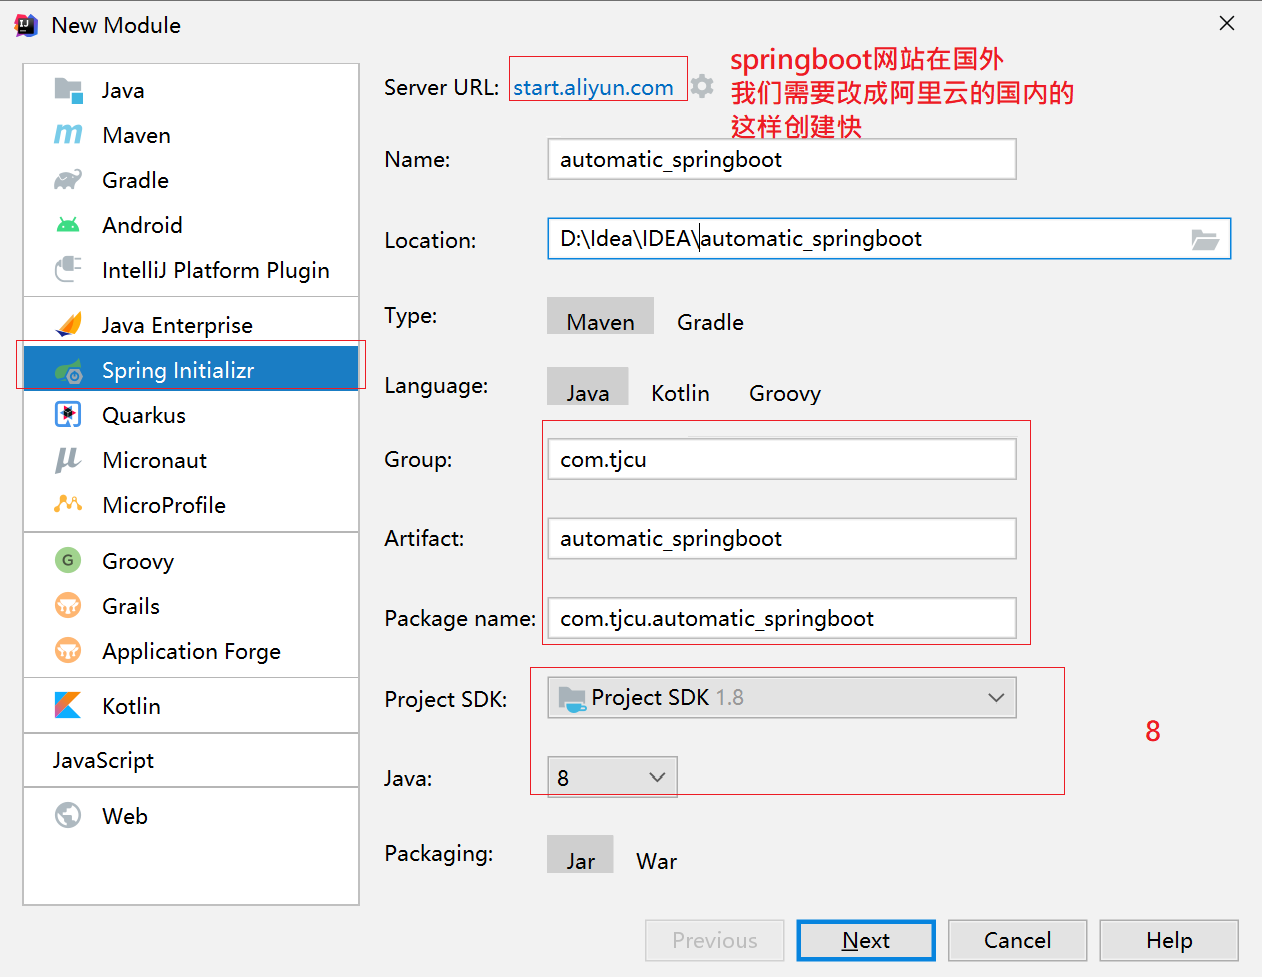
1、创建SpringBoot项目
- 注意:server URL使用阿里云:
start.aliyun.com
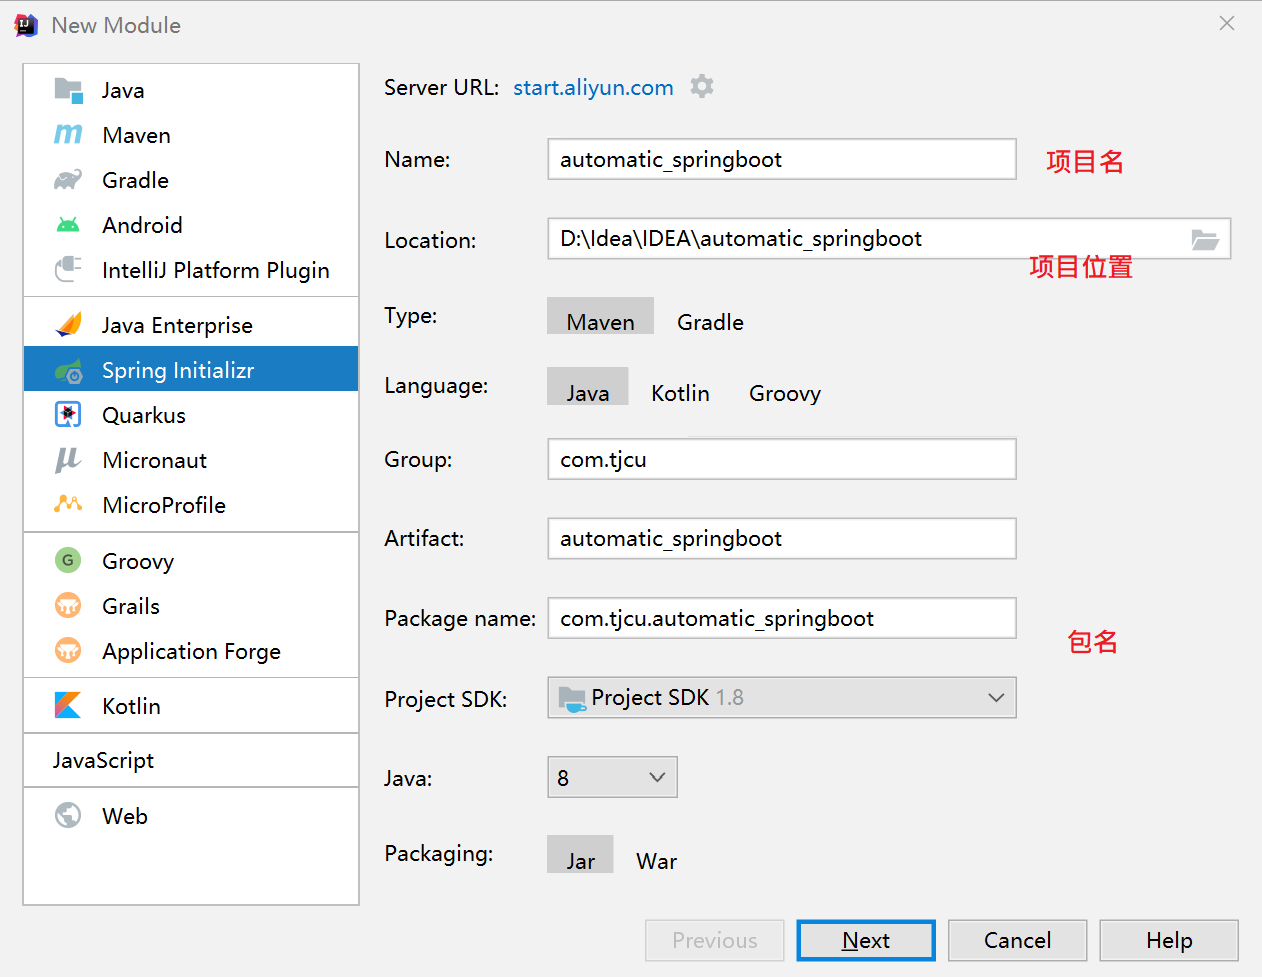
2、设置我们的项目名称等内容
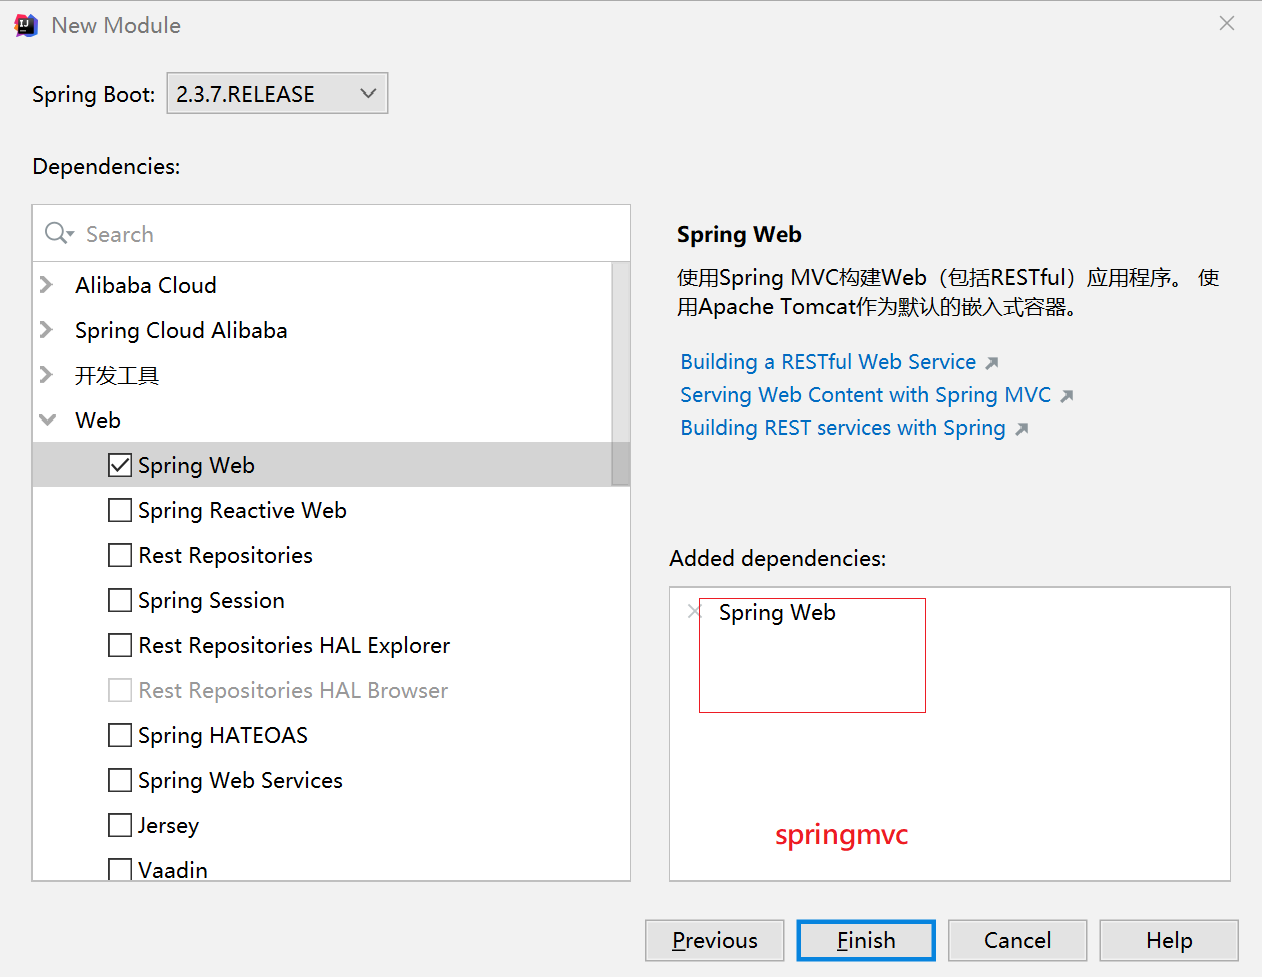
3、导入SpringMVC的jar包
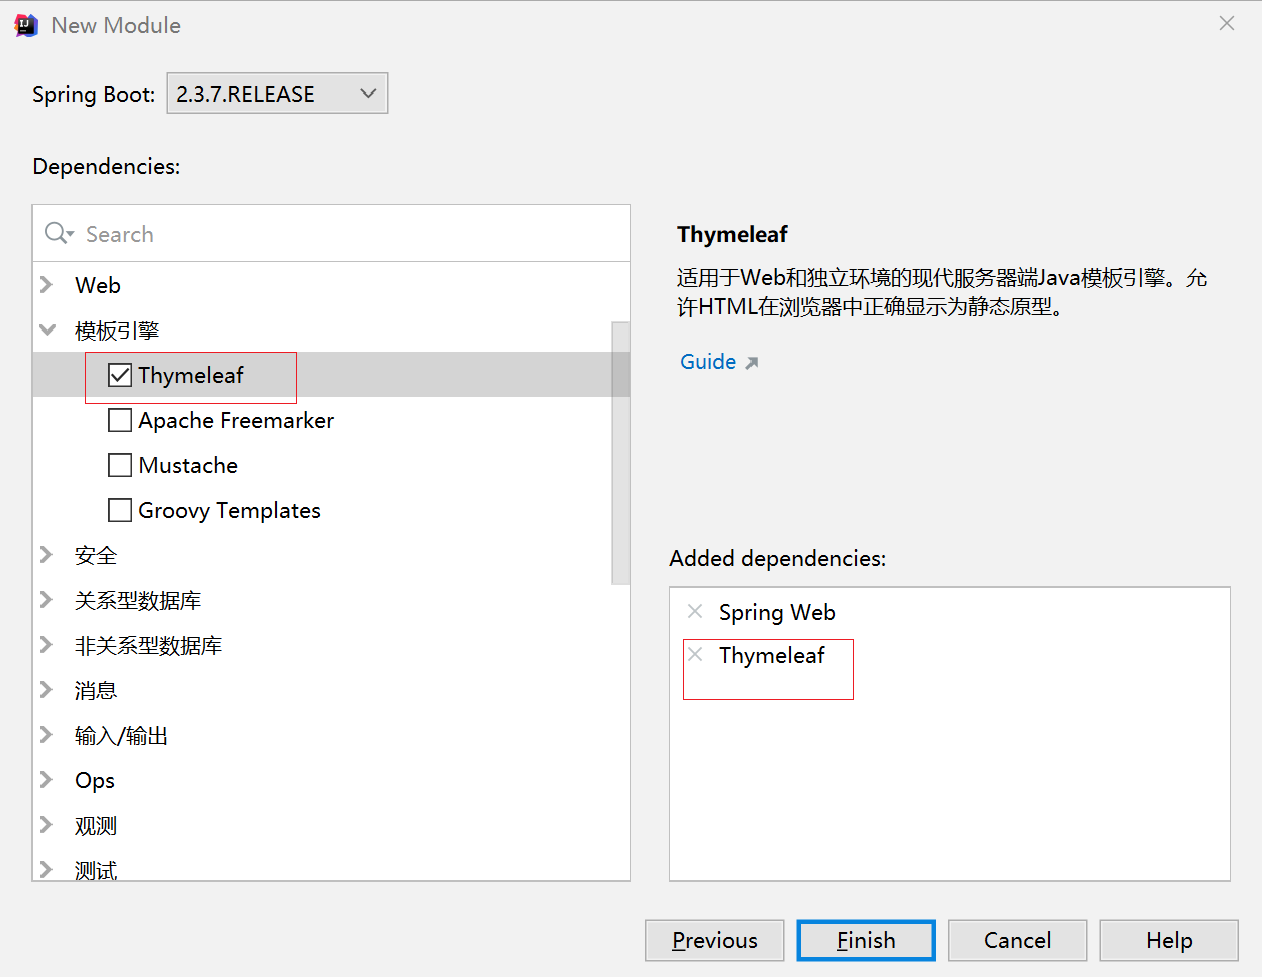
4、选择模板引擎
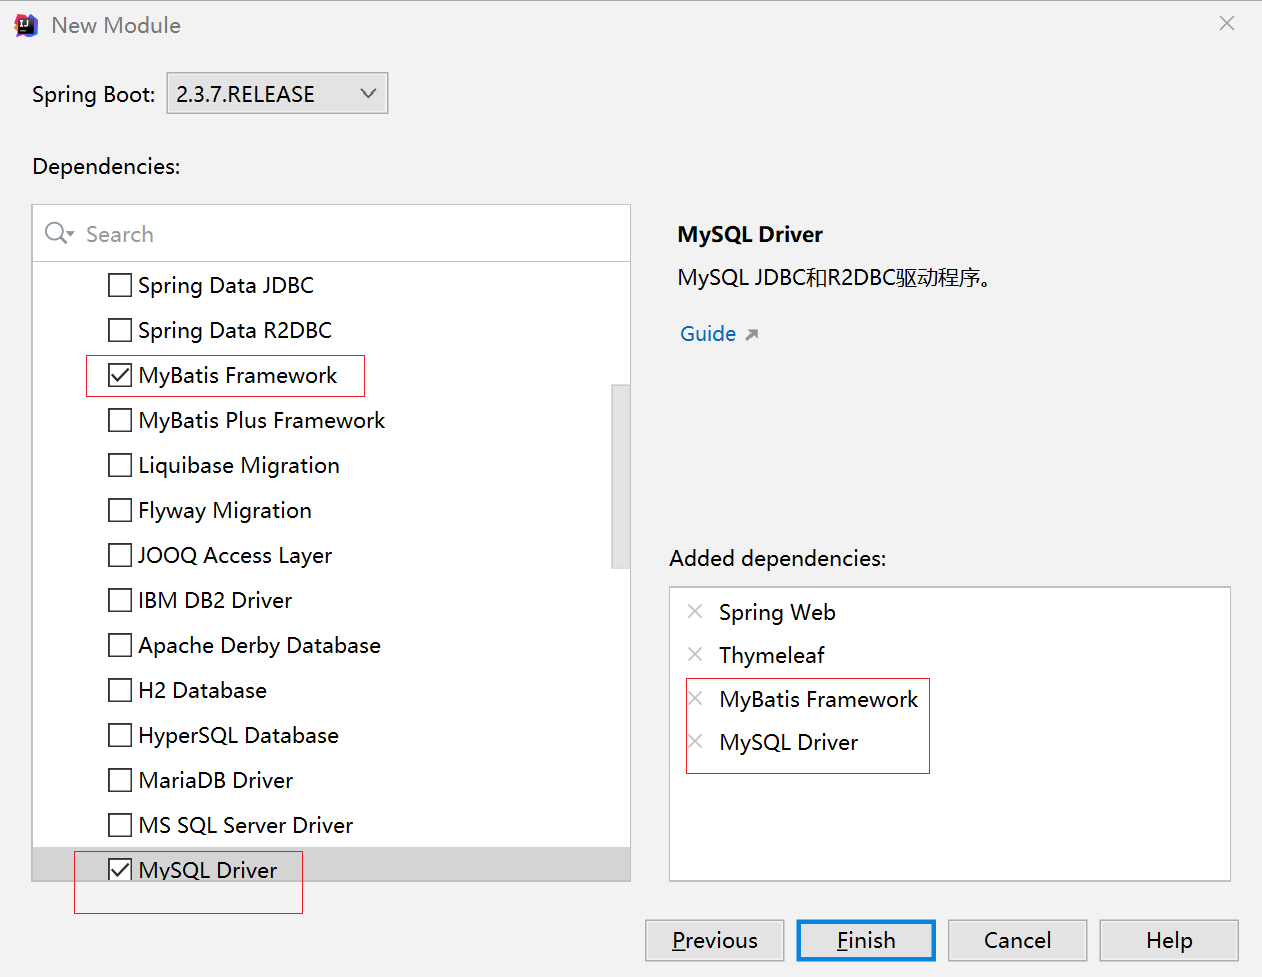
5、选择关系型数据库操作的mybatis以及我们的mysql驱动
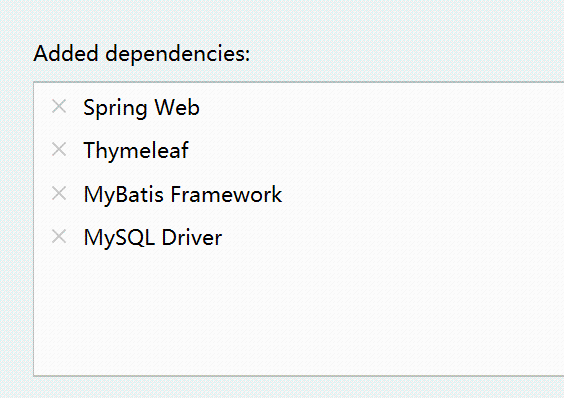
6、我们选择的依赖内容
- 我们的项目会自动下载我们需要的这些框架组件的jar包,会帮我们默认配置好
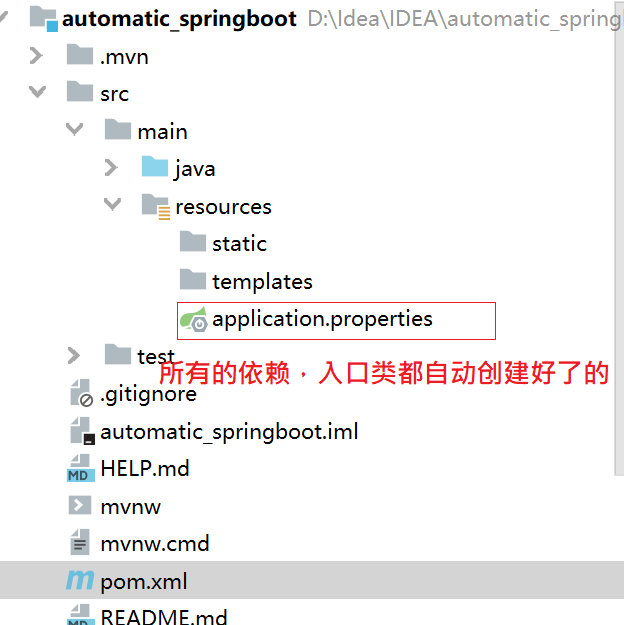
7、项目的目录结构
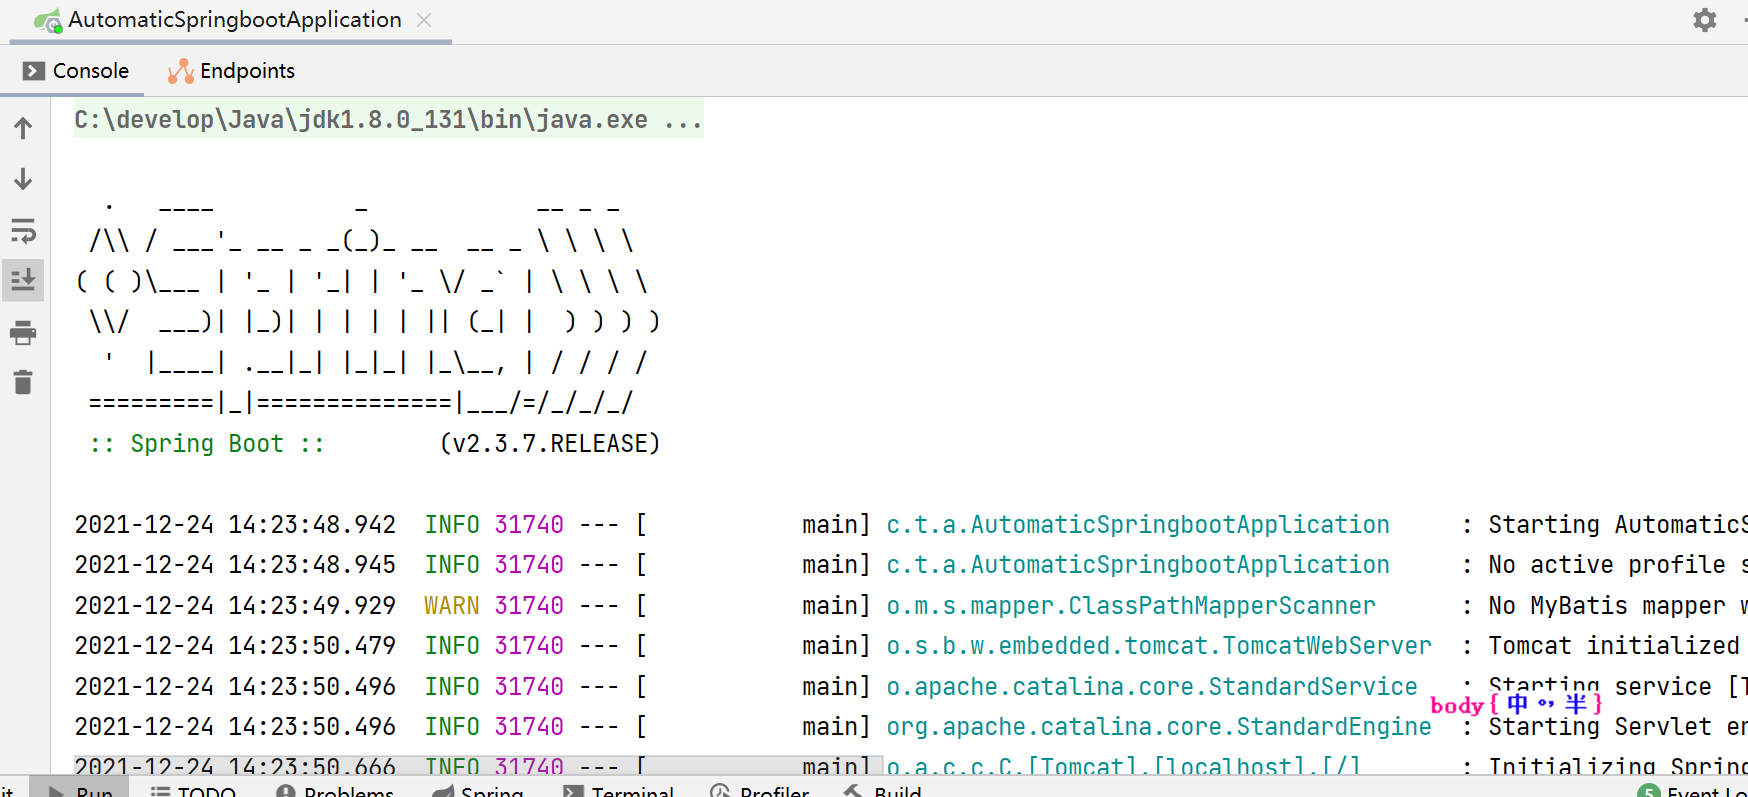
8、启动后项目不报错,就OK了!
今天的分享到此就结束了,感谢您的阅读,如果确实帮到您,您可以动动手指转发给其他人。
下一篇
已是最新文章


