intellij idea 安装教程_2020教程
Hi,大家好,我是编程小6,很荣幸遇见你,我把这些年在开发过程中遇到的问题或想法写出来,今天说一说
intellij idea 安装教程_2020教程,希望能够帮助你!!!。
IDEA安装教程目录
一、JDK的彻底卸载(选做)
二、JDK的安装
三、IDEA的安装
四、IDEA的扩展
五、代码测试
六、Error:Cannot determine path to 'tools.jar' library for 17 (D:\jdk-17.0.1)报错的解决方案
七、说明
写在前面:JDK版本要与IDEA版本相匹配,不然会报错嗷(即:第六节所示)!因为我之前有JDK,所以为了更好的演示,我先把JDK17卸载了。如果你有JDK请查看你的JDK版本后进行第二步(本篇文章IDEA版本选取的是2020.1(扩展教程不适用于2022及以后的版本),所以JDK要求在JDK14及以下,如果是高版本JDK,请下载高版本的IDEA 如:IDEA 2021.3),如果你没有JDK直接进行第二步,如果你想要彻底卸载JDK请参考第一步。IDEA分为旗舰版(ULtimate)和社区版(Community),Community为免费版本,ULtimate版可以通过教育认证的方式免费使用。本篇文章所安装的是ULtimate版,本文仅供学习使用。
IDEA的官网为:IntelliJ IDEA – the Leading Java and Kotlin IDE (jetbrains.com)
一、JDK的彻底卸载(选做)
Step one:在控制面板找到Java(TM) SE Development Kit 17.0.1(64-bit),右键->卸载
Step two :键盘按Win+R,输入"regedit"打开注册表编辑器,
找到如下目录:
HKEY_LOCAL_MACHINE/SOFTWARE/JavaSoft 如图:
将JavaSoft文件夹及其子目录全部删除。
Step three:删除系统环境变量
右键计算机→属性→高级系统设置→高级→环境变量
1>找到系统变量→删除 JAVA_HOME 变量 和 CLASSPATH 变量,即:
2>编辑系统 Path 变量删除里面的 %JAVA_HOME%\bin; 和 %JAVA_HOME%\jre\bin;即:
Step four:将C盘中Windows\System32和Windows\SysWOW64文件夹下的java.exe, javaw.exe 和 javaws.exe文件删除(如果未找到请忽略)
Step five:在cmd中,输入Java,如图,即卸载成功:
二、JDK的安装
1)JDK17的下载(IDEA2020请下载jdk11):
官网(这个无需注册,可直接下载最新版本):Java Downloads | Oracle

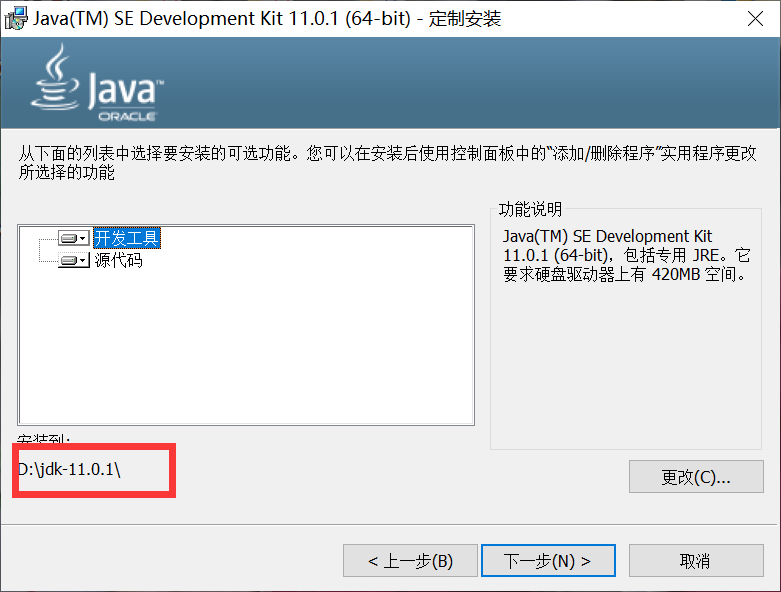
自定义安装路径:
等待自动安装完成:
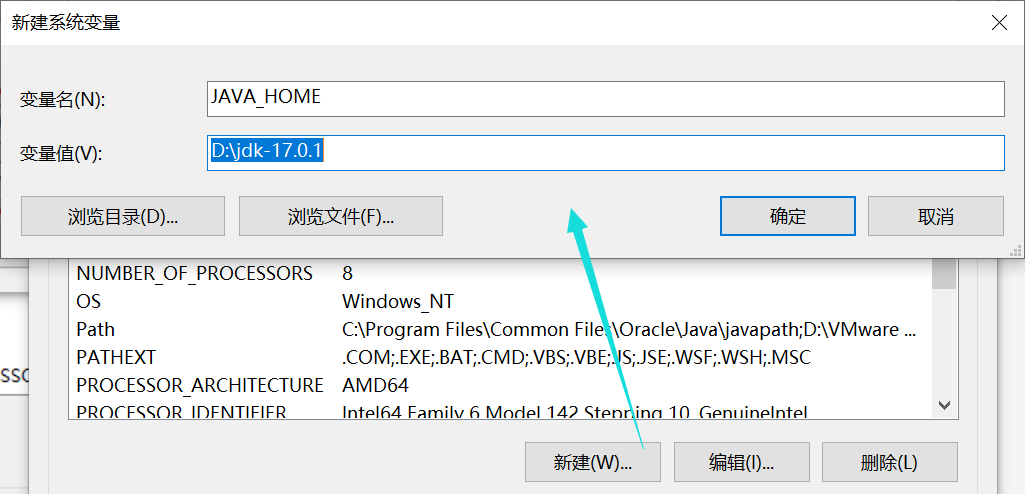
配置系统环境变量:(详见JDK11的部分,这里只列了一个图,其他的与JDK11配置相同)
2)JDK11的下载:
渠道一:官网下载(要注册的,所以可以选择渠道二)官网链接:Java Downloads | Oracle
JDK11直通地址:Java Downloads | Oracle
点击Download jdk-11.0.13_windows-x64_bin.exe,同意协议登录即可下载:
渠道二:这里提供一个华为jdk源镜像地址:Index of java-local/jdk
jdk11.0.1下载地址:Index of java-local/jdk/11.0.1+13

公众号:蓝多多的小仓库 发送:jdk 即可提取。3)安装:双击,选择安装路径

Step one:右键计算机→属性→高级系统设置→高级→环境变量
Step two:新建->变量名"JAVA_HOME",变量值"D:\jdk-11.01"(这里应是自己JDK的安装路径)
Step three:新建->变量名"CLASSPATH",变量值为:(注意:加粗部分都要复制,别复制少了,前面俩标点的意义为表示当前路径)
".;%JAVA_HOME%\lib;%JAVA_HOME%\lib\dt.jar;%JAVA_HOME%\lib\tools.jar"即复制:
.;%JAVA_HOME%\lib;%JAVA_HOME%\lib\dt.jar;%JAVA_HOME%\lib\tools.jarStep four:编辑系统环境变量->双击"Path",点击"新建",输入"%JAVA_HOME%\bin",点击"确定",再点击"新建",输入"%JAVA_HOME%\jre\bin",单击确定。
附:环境变量相关解释(来源:JDK的最详细的安装教程 - 小玲子丫 - 博客园):
变量名:JAVA_HOME
变量值:D:\jdk-11.01
用途:定义一个变量,供其他地方使用
变量名:Path
变量值:%JAVA_HOME%\bin;%JAVA_HOME%\jre\bin;
用途:让系统在任何路径下都可以识别java、javac、javap等命令
变量名:CLASSPATH
变量值:.;%JAVA_HOME%\lib\dt.jar;%JAVA_HOME%\lib\tools.jar
用途:告诉jvm要使用或执行的class放在什么路径上,便于JVM加载class文件,.;表示当前路径,tools.jar和dt.jar为类库路径
5)查看是否安装成功及安装版本
Win+R在cmd中输入:
java -version三、IDEA的安装
Step one:下载
IDEA下载官网:http:// https://www.jetbrains.com/idea/
由于新版本可能不稳定,这里选择其他旧版本(Other versions):

点击即可下载:
当然,我下载好的在网盘里也有(建议你去官网下载,速度更快)
公众号:蓝多多的小仓库 发送:IDEA2020 即可提取。Step two:安装
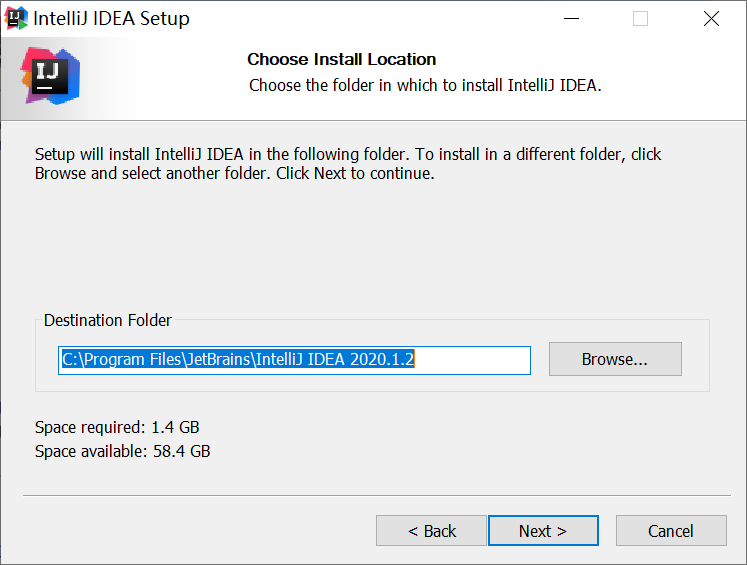
双击下载的exe安装程序,选择安装路径
勾选64位(根据自己电脑选择,不要选错,否则之后无法正常启动)
Next>
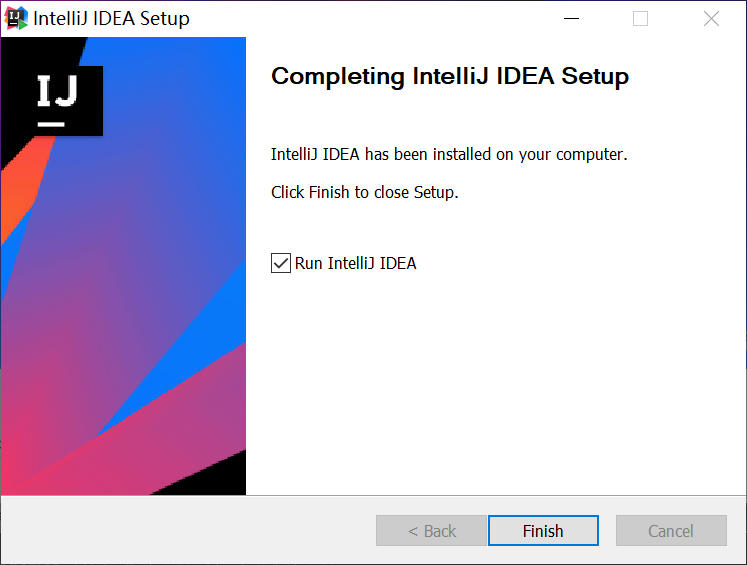
Next>勾选Run IntelliJ IDEA

这里点击左下角跳过即可:
选择Evaluate for free,试用30天,点击Evaluate(别着急,后面有扩展教程)
开始创建工程
如果你没有进行第二步下载JDK,那么这里是<No SDK>的,你可以选择Download JDK(这里默认下载最新版,所以如果你IDEA版本不够新,就会报第六节的错误)
这里我做了第二步所以,直接下拉选择自己下载的JDK即可:
创建工程(可跳过)
到此,IDEA的安装及创建JAVA工程就完成了,如果你只是短期使用,即可跳转到第五步。
四、IDEA的扩展
1、下载jetbrains-agent:
支持正版软件,如果您是学生您可以选择用学校的邮箱进行教育认证的方式(我就采用的教育认证,很方便),也可以安装Community版本(足够你使用了)。
教育认证的方法如下:IDEA教育认证方法及Certificate used to sign the license is not signedby JetBrains root certificate的解决方案-CSDN博客
如果您需要本文的jetbrains-agent下载链接可以从 公众号:蓝多多的小仓库 回复关键词:jetbrains-agent 获取。 (如果您是高版本建议您自己在网上去找资源,很多滴, 我这个适用于2020版本嗷,之前存的,有点久远了)2、将jetbrains-agent压缩包移入当前界面
3、在弹窗中选择Restart,重启
4、选择为IDEA安装:
5、选择是(Y)
6、查看信息:
取消自动更新:File->Settings->Updates->取消勾选
五、代码测试
1、新建一个Java Class,类名为hello:
2、测试代码:
public class hello { public static void main(String[] args) { System.out.println("hello world!"); } }3、测试结果:
六、Error:Cannot determine path to 'tools.jar' library for 17 (D:\jdk-17.0.1)报错的解决方案
报错原因:JDK与 IntelliJ IDEA的版本不匹配
方案一:降低 JDK 的版本,使当前 IntelliJ IDEA 能够识别(2020.1的IDEA 需要JDK 14及以下)
方案二:提高 IntelliJ IDEA 的版本(安装JDK17的话需要2021版的IDEA)
七、说明
1、本篇文档的教程已经过博主本人亲自尝试,如有疑问可以留言或私信博主。
2、如果您觉得此篇文章对您有帮助,麻烦您一键三连嗷!我们一起学习!一起进步!
今天的分享到此就结束了,感谢您的阅读,如果确实帮到您,您可以动动手指转发给其他人。
下一篇
已是最新文章


